Video Demo:
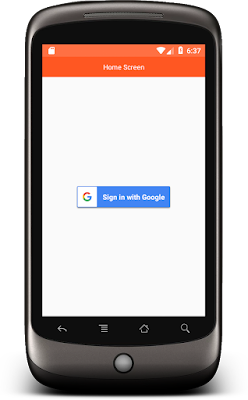
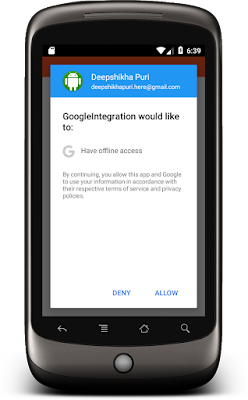
Firebase provide a authentication facility to a application or web user to login with their Facebook, Google, Twitter etc account. In this article, I would like to talk about Google Authentication using Firebase in react native android application. DOWNLOAD SOURCE CODE FROM HERE.
Project Setup Steps->
Step 1-> To create your project run this command:
Step 2->
Now initialise your project name. Replace your project name with MovingScreen:
Step 3->
Now Intall Firebase google login library in your react native project
Step 4>
Link your Firebase Google Signin library with your project
Firebase configuration for Android
Step 1>
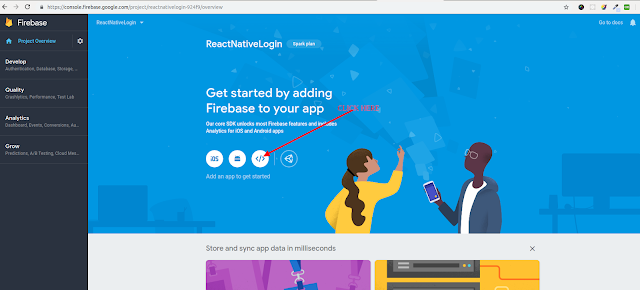
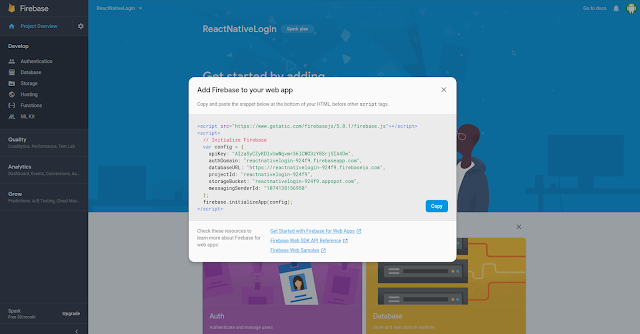
Open your firebase console (https://console.firebase.google.com/)
Step 2>
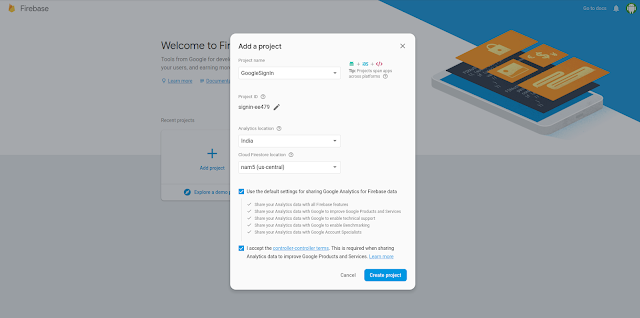
Add your Project details in Firebase
Step 3>
Enable Google Login in Firebase Console
Path ProjectOverview->Authentication->Google

Step 4>
Add the SHA key and package name of your project in Firebase Console

Step 5>
Download your google-services.json from firebase console
Now setup the firebase dependencies and json file in your Android project
Step 1>
Add google service classpath in your android Project
Path ProjectName->Android-> build.gradle

Step 2>
Add google service plugin in your android Project
Path ProjectName->Android->app-> build.gradle

Step 3>
Add google-services.json in your android Project
Path ProjectName->Android->app-> google-services.json
Now you can start work on your React native project
HomeScreen.js:
Download source code from here
Firebase provide a authentication facility to a application or web user to login with their Facebook, Google, Twitter etc account. In this article, I would like to talk about Google Authentication using Firebase in react native android application. DOWNLOAD SOURCE CODE FROM HERE.
Project Setup Steps->
Step 1-> To create your project run this command:
sudo npm install -g react-native-cliStep 2->
Now initialise your project name. Replace your project name with MovingScreen:
react-native init MovingScreen Step 3->
Now Intall Firebase google login library in your react native project
yarn add react-native-google-signin
Step 4>
Link your Firebase Google Signin library with your project
react-native link react-native-google-signin
Firebase configuration for Android
Step 1>
Open your firebase console (https://console.firebase.google.com/)
Add your Project details in Firebase
Step 3>
Enable Google Login in Firebase Console
Path ProjectOverview->Authentication->Google

Step 4>
Add the SHA key and package name of your project in Firebase Console

Step 5>
Download your google-services.json from firebase console
Now setup the firebase dependencies and json file in your Android project
Step 1>
Add google service classpath in your android Project
Path ProjectName->Android-> build.gradle
classpath 'com.google.gms:google-services:4.2.0' // <--- use this version or newer

Step 2>
Add google service plugin in your android Project
Path ProjectName->Android->app-> build.gradle
apply plugin: 'com.google.gms.google-services' // <--- this should be the last line

Step 3>
Add google-services.json in your android Project
Path ProjectName->Android->app-> google-services.json
Now you can start work on your React native project
HomeScreen.js:
import React ,{Component} from 'react'
import{StyleSheet,View,Text, StatusBar,Image,Button} from 'react-native'
import {GoogleSignin, GoogleSigninButton,statusCodes} from 'react-native-google-signin'
export default class HomeScreen extends Component {
state ={ userDetails:'', GoogleLogin:false, }
render(){ return( <View style={styles.container}> <StatusBar backgroundColor='#FF7043'></StatusBar>
<View style={styles.headerContainer}> <Text style={styles.headerTxt}>Home Screen</Text> </View>
<View style={this.state.GoogleLogin? {display:"none"}:styles.signinContainer}>
<GoogleSigninButton style={{width:192, height:50}} size={GoogleSigninButton.Size.Wide} color={GoogleSigninButton.Color.Dark} onPress={this.signIn}> </GoogleSigninButton> </View>
<View style={this.state.GoogleLogin? styles.userDetailContainer: {display:'none'}}> <Image style={styles.userImage} source={{uri: this.state.userDetails.photo}}></Image> <Text style={styles.txtEmail}>{this.state.userDetails.email}</Text> <Text style={styles.txtName}>{this.state.userDetails.name}</Text> <Button color="#FF5722" title='Logout' onPress={this.signOut}></Button>
</View> </View> ) }
signOut = async()=>{ try{ await GoogleSignin.revokeAccess(); await GoogleSignin.signOut() this.setState({ userDetails:'', GoogleLogin:false, } ) }catch(error){ console.log(error.toString()) } }
signIn = async () => { try { await GoogleSignin.hasPlayServices(); const userInfo = await GoogleSignin.signIn(); console.log('User Details', JSON.stringify(userInfo))
this.setState({ GoogleLogin:true, userDetails:userInfo.user,
})
} catch (error) {
this.setState({ GoogleLogin:false, })
if (error.code === statusCodes.SIGN_IN_CANCELLED) { console.log("Cancel ", statusCodes.SIGN_IN_CANCELLED ) // user cancelled the login flow } else if (error.code === statusCodes.IN_PROGRESS) { console.log("InProgress ", statusCodes.IN_PROGRESS ) // operation (f.e. sign in) is in progress already } else if (error.code === statusCodes.PLAY_SERVICES_NOT_AVAILABLE) { console.log("Not Available ", statusCodes.PLAY_SERVICES_NOT_AVAILABLE) // play services not available or outdated } else { console.log("Error ", error) } } };
}
GoogleSignin.configure({ scopes: ['https://www.googleapis.com/auth/drive.readonly'], // what API you want to access on behalf of the user, default is email and profile webClientId: '602222878267-1ki3ucs1nso4t4scrnh5mem9sr6mjd20.apps.googleusercontent.com', // client ID of type WEB for your server (needed to verify user ID and offline access) offlineAccess: true, // if you want to access Google API on behalf of the user FROM YOUR SERVER hostedDomain: '', // specifies a hosted domain restriction loginHint: '', // [iOS] The user's ID, or email address, to be prefilled in the authentication UI if possible. [See docs here](https://developers.google.com/identity/sign-in/ios/api/interface_g_i_d_sign_in.html#a0a68c7504c31ab0b728432565f6e33fd) forceConsentPrompt: true, // [Android] if you want to show the authorization prompt at each login. accountName: '', // [Android] specifies an account name on the device that should be used // iosClientId: '<FROM DEVELOPER CONSOLE>', // [iOS] optional, if you want to specify the client ID of type iOS (otherwise, it is taken from GoogleService-Info.plist) });
const styles = StyleSheet.create({ container:{ flex:1 },
headerContainer:{ width:'100%', height:40, justifyContent:'center', backgroundColor:'#FF5722', },
headerTxt:{ fontSize:13, color:'white', alignSelf:'center' },
signinContainer:{ flex:1, justifyContent:'center', alignItems:'center', },
userDetailContainer:{ flex:1, width:'100%', alignItems:'center', justifyContent:'center' },
userImage:{ width:100, height:100, },
txtEmail:{ color:'black', marginTop:10, fontSize:13, },
txtName:{ color:'black', margin:10, fontSize:13, }
})
Download source code from here
